Frozen Bubbles
By Ariniko O'Meara | Posted January 7, 2014 | Previous Entry | Next Entry
I tend to get really bored if I don't have something creative to do. I have been known to create projects just to have something to work on. I will develop a new, inspiring project just to design the logo for it. You have no idea how many unused logos I have in my projects folder. Today was suppose to be our first back to school day after an already longer than normal break, since the kids had a snow day the Friday before they were actually suppose to be on break. Our Ellie was home sick the Thursday before as well, so, yeah, it's feeling like eternity since school's been in and I was looking forward to getting back on schedule. Yet, here we are with at least two more extra vacation days. On these extraordinary weather situations I love taking photos. This one, unfortunately, was just a bunch of drifty snow and wasn't very interesting. It's incredibly cold out too but was it cold enough to possibly freeze a bubble? Well, let's go check that one out! My cousin had posted photos of another photographer that captured incredible photos of the bubbles she blew with her son. How hard could it be I thought? It took me two long, cold hours but I think I was able to perfect a frozen bubble and it was pretty interesting of a task. So here are my steps to making the perfect Mid Michigan, snow storm frozen bubble.
Supplies: bubble mix, blow wand (or straw), glass bowl or juice glass, camera
- The bubble mix: I used regular old store bought. Some of the instructions online suggested 3 cups water to 1 cup dish soap and 1/2 cup corn syrup. I decided to try the regular stuff first.
- If you're not taking photos I bet all of these steps would be a lot easier. If you are, make sure you have all your supplies in hand. I took a cardboard box out with me to kneel on.
- Warm your bubble mix in the microwave for about 30 seconds.
- Wear gloves, but then take them off because all these steps are hard to do with gloves on and I now have three pair that have bubble mix all over them.
- Use the bubble wand BUT if you can find any plastic tube straw type thing, use that! Part of the process is to blow the bubble onto the bottom of the glass or bowl. It's much easier with the straw.
- Once you have your supplies, head outside. Here in Lansing it's about 9 degrees with a wind chill of -25. The wind is gusty and that makes this project very, very difficult. I tried to find a little spot that didn't have too much extra wind which ended up being a little nook behind my chimney and completely blocked by the house.
- Set the glass upside down into the snow.
- Pour a little bit of the warm bubbles onto the bottom of the glass.
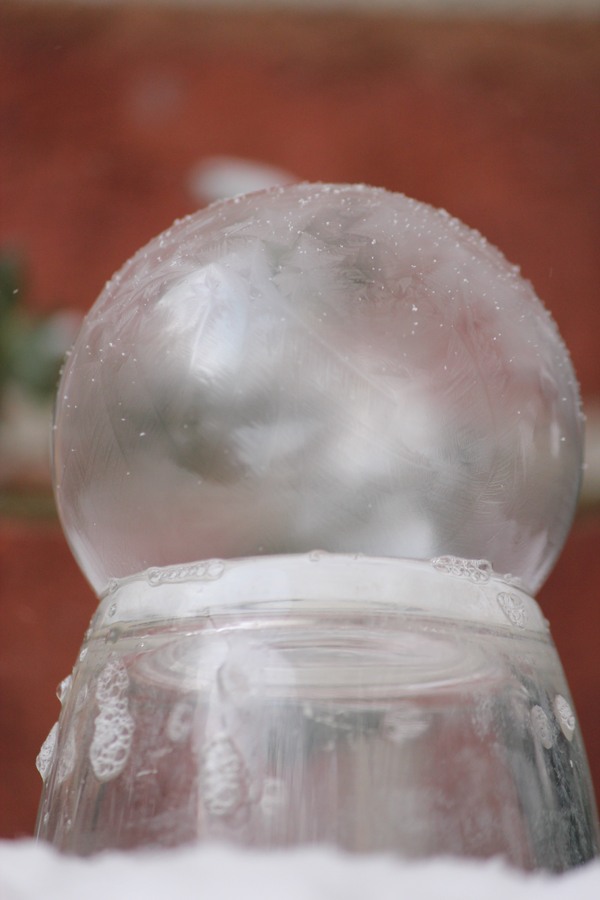
- Use the wand or straw to slowly blow a bubble right onto the glass. If you come at it a little off the edge of the glass it seemed to work better. If you yank the wand or straw away from the bubble too fast it popped. Once you get a good bubble that stays it shouldn't take long to freeze.
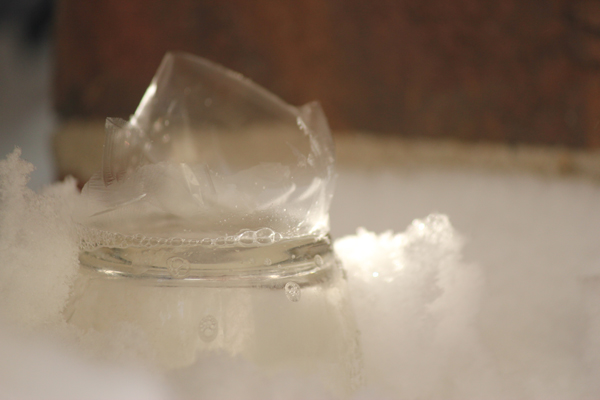
- Sit and watch as the bubble slowly turns to ice. Any wind that comes through will ruin it though.
- Keep trying until it works or you get too cold.
Best of luck!
Ariniko


